Superb Platform과 Apps
우리 회사 플랫폼의 제품군은 크게 Label, Curate, Model, 그리고 Apps로 구성되어 있다.
고객이 업로드한 이미지나 비디오에서 Curate를 통해 데이터를 선별하고, Label에서 라벨을 붙이고, Model에서 AI 모델을 학습시켜 플랫폼 사용자는 나만의 Vision AI 모델을 손쉽게 API 형태로 사용할 수 있다.
그중 Apps는 고객이 플랫폼을 더 쉽고 유연하게 활용할 수 있도록 돕는 자동화 도구들을 제공한다.
주요 목적은 다음과 같다:
- 기존에 다른 라벨링 툴에서 작업한 데이터를 Superb Platform 에 업로드
- (ex. YOLO, COCO, Labelme 등 다양한 어노테이션 포맷 → Superb 형식으로 자동 변환 후 플랫폼에 업로드)
- 이미지에서 사람 얼굴을 감지하고 자동으로 비식별화(blur)
- OCR로 텍스트 영역을 자동 감지하고 바운딩 박스를 생성
즉, 고객이 “이사”오는 과정에서 겪는 여러 번거로운 과정을 자동화함으로써 onboarding을 부드럽게 만든다.
Apps는 어떻게 실행되는가?
Apps는 여러 기능들을 개별 app 형태로 제공하는 Superb Platform의 구성 요소이며, 각 app은 독립적인 컨테이너로 실행되어 Kubernetes 상에서 운영된다. 실행 흐름은 다음과 같다:
- 사용자가 웹 프론트를 통해 데이터를 업로드하면, 해당 파일은 S3에 저장된다.
- 지정된 app이 실행되어 S3의 입력 데이터를 내려받아 처리한다.
- 처리 결과는 다시 S3에 업로드되거나, 다운로드 링크 또는 플랫폼 내 리소스로 제공된다.
- 이 모든 과정은 Apps의 백엔드 서버와의 통신을 통해 상태 및 진행 상황이 관리된다.
개별 app은 다양한 개발자가 만들지만, 공통된 실행 흐름과 시스템 환경을 모두 이해해야만 동작하도록 만들고 싶지는 않았다.
AppWrapper의 목적은 앱 실행에 필요한 공통 작업들을 추상화하여, 개발자가 비즈니스 로직에만 집중할 수 있게 하는 것이었다.
하지만 이 실행 흐름은 단순해 보이는 것과 달리, 환경 설정, presigned URL 요청, 오류 처리, 결과 업로드 등을 앱마다 수작업으로 구현하면 유지보수와 품질 관리가 매우 어려워진다.
AppWrapper의 역할
Apps의 실행 흐름에는 파일 다운로드, 결과 업로드, 상태 보고 등 반복되는 작업이 필수적으로 포함된다. 이런 공통 작업을 자동으로 처리해주는 유틸리티가 바로 AppWrapper다.
AppWrapper는 클래스 데코레이터 방식으로 동작하며, 다음과 같은 실행 흐름을 관리한다:
앱 실행 전 (Pre-Processing)
- 앱 실행에 필요한 입력 파일 목록과 파일 저장 경로, 작업 ID 등의 실행 정보를 시스템으로부터 전달받는다.
- 전달받은 정보를 기반으로, 사용자가 웹에서 업로드한 파일들을 S3에서 가져와 Pod의 로컬 디렉터리에 저장한다. (정확히는 emptyDir 형태)
- 만약 실행 준비 중 오류가 발생하면, 해당 작업은 즉시 실패 처리되고 상태가 백엔드로 보고된다.
앱 실행 중
- 개발자가 작성한 process() 함수를 호출하여 실제 비즈니스 로직을 수행한다.
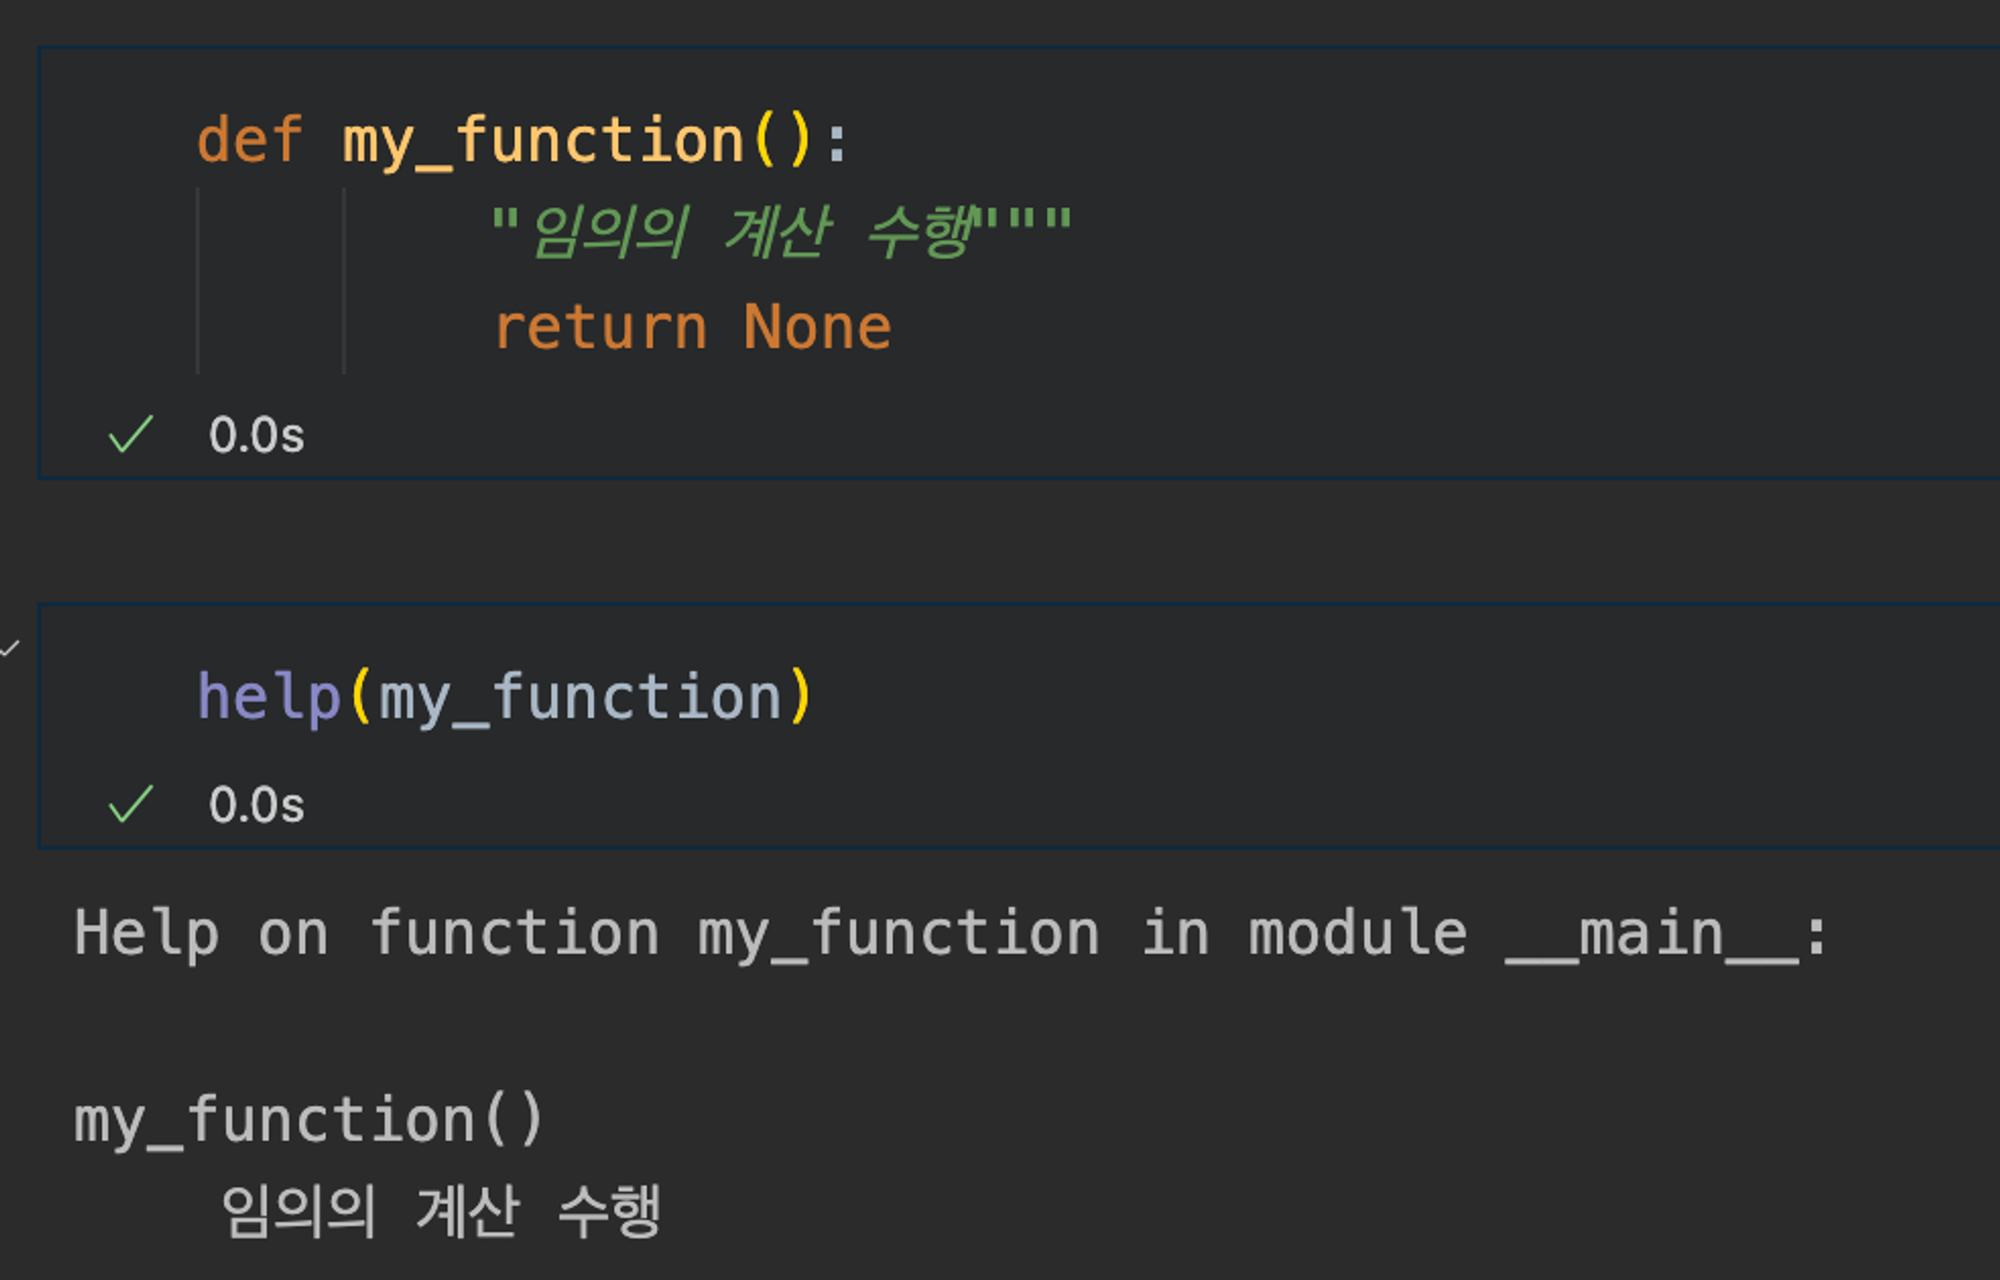
- 예를 들어 다음과 같이 간단히 작성할 수 있다:
@AppWrapper()
def process():
    # 예: YOLO 라벨 포맷을 Superb 포맷으로 변환
    return {
        "type": "download",
        "file_path": "/tmp/converted.zip"
    }

process()
실행 후 (Post-Processing)
- 결과의 타입이 download인 경우 → presigned PUT URL을 통해 파일 업로드 후 웹 프론트에서 사용자가 결과 파일 download 가능
- 결과의 타입이 link인 경우 → URL 그대로 반환
- 상태 업데이트 및 로그 저장 (S3에 로그 업로드 포함)
결과 포맷은 단순하지만 명확하다
이 통일된 구조 덕분에, 어떤 앱이든 동일한 방식으로 결과를 처리할 수 있다.
Case 1: type이 link인 경우
{
    "type": "link",
    "url": "특정url",
    "label": "Go to Project"
}
- app의 결과물이 hyperlink인 경우
- url key가 필요 (ex) platform의 특정 url)
- label key는 화면에서 보여줄 내용 (ex) 아래 사진에 가장 오른쪽 “Go to Project “버튼 )

Case 2: type이 download인 경우
- app의 결과물이 파일인경우
- file_path key가 필요 (Pod 내부의 파일 경로)
AppWrapper의 도입 효과
| 항목 | 개선 전 | 개선 후 |
| 코드 중복 | presigned 요청, S3 처리 반복 | 데코레이터로 추상화 |
| 예외 처리 | 앱마다 오류 처리 제각각 | 실패 시 상태 일괄 업데이트 |
| 로그 수집 | 개발자가 직접 구현 | 자동 S3 업로드 |
| 개발 속도 | 새로운 앱 추가 시 부가작업 다수 | 비지니스 로직만 구현하면 끝 |
이 구조 덕분에 앱 개발자는 “파일을 어떻게 받을지, 어디에 저장할지, 상태를 어떻게 보고할지” 같은 운영상의 디테일을 몰라도 앱 로직만 작성하면 된다.
실제 AppWrapper 데코레이터 내부는 어떻게 구현되어 있을까?
AppWrapper는 클래스지만, __call__ 메서드를 구현함으로써 함수 데코레이터처럼 동작한다. 로컬 모드와 운영 모드가 명확히 분기되어 있어 개발/운영 환경에서 모두 활용 가능하고, 예외 발생 시 즉시 로그 저장 & 상태 보고를 통해 시스템 안정성 확보한다.
class AppWrapper:
	....

	def __call__(self, func):
        def inner(*args, **kwargs):
            if self.LOCAL_MODE:
                try:
                    result = func(*args, **kwargs)
                except Exception as e:
                    logger.error(e)
                    sys.exit(1)
            else:
                try:
                    result = func(*args, **kwargs) # 비지니스 로직 함수
                except Exception as e:
                    logger.error(traceback.format_exc())

                    .....

                    if task_data["Task"]["status"] != Status.Canceled.value:
                        self.send_pod_log_to_s3() # pod 로그 s3로 전송
                        self.update_status(Status.Failed.value, str(e))

                try:
                    # 반환된 결과 포맷 유효성 검사
                    self.validate_result_format(result)

                    # 파일이 포함된 경우 업로드
                    if result["type"] == "download":
                        self.upload_file_to_s3(result)

                    # 결과를 backend에 전송
                    data = {"task_id": self.task_id, "result": result}
                    self.send_pod_log_to_s3()
                    requests.post(
                        f"{self.TOAD_HOST}/output/",
                        data=json.dumps(data),
                    )

                    # 성공 상태 업데이트
                    self.update_status(Status.Complete.value, "App completed")

                except Exception as e:
                    error_log = f"Post app failed: {e}"
                    self.update_status(Status.Failed.value, error_log)

        return inner
AppWrapper는 어떻게 활용되고 있을까?
AppWrapper는 내부 앱 개발자들이 공통으로 사용할 수 있도록 구조화되어 있으며,
별도의 설치 없이 앱 코드에서 쉽게 가져다 사용할 수 있도록 PyPI에 패키징되어 배포되어 있다.
$ pip install AppWrapper
- PyPI에 공개(링크)되어 있어 누구나 설치는 가능하지만, 소스 코드는 private GitHub repository에서 관리되고 있어 내부 사용자만 직접 수정하거나 검토할 수 있다.
- 앱 개발자는 별도의 설정 없이 @AppWrapper 데코레이터만 붙이면, 파일 다운로드, 결과 업로드, 상태 보고, 로그 저장 등 반복되는 실행 흐름을 자동으로 처리할 수 있다.
개선 포인트와 앞으로의 방향
AppWrapper는 현재까지 수십 개의 앱에서 안정적으로 사용되며, 개별 app들의 실행 흐름에 많은 역할을 하고 있다.
하지만 실제 운영하면서 다음과 같은 개선 가능성도 보였다:
1. 단일 클래스가 너무 많은 책임을 가짐
- 환경 초기화, 파일 다운로드/업로드, 상태 전송, 로그 처리, 예외 핸들링 등 너무 많은 역할이 한 클래스에 몰려 있다.
- SRP(Single Responsibility Principle)를 따르는 구조로 리팩토링할 필요가 있다.
(예: S3Client, StatusManager, ResultValidator 등으로 분리)
2. 결과 포맷의 유효성 검사는 코드로만 정의됨
- result는 dict 형식에 "type", "url" 혹은 "file_path"가 필요하지만, 이를 Pydantic 등으로 명시하지 않았다. Pydantic 기반의 result schema 도입을 통해 유효성 검사를 개선할 수 있겠다.
'Python' 카테고리의 다른 글
| [책리뷰] CPython 파헤치기 6장. 렉싱과 파싱 (0) | 2024.11.24 |
|---|---|
| [책리뷰] 파이썬 클린 코드 Chapter 3. 좋은 코드의 일반적인 특징 (0) | 2024.11.10 |
| [책리뷰] CPython 파헤치기 5장. 구성과 입력 (0) | 2024.11.10 |
| [책리뷰] CPython 파헤치기 4장. 파이썬 언어와 문법 (0) | 2024.11.10 |
| pathlib 모듈 (0) | 2024.10.20 |